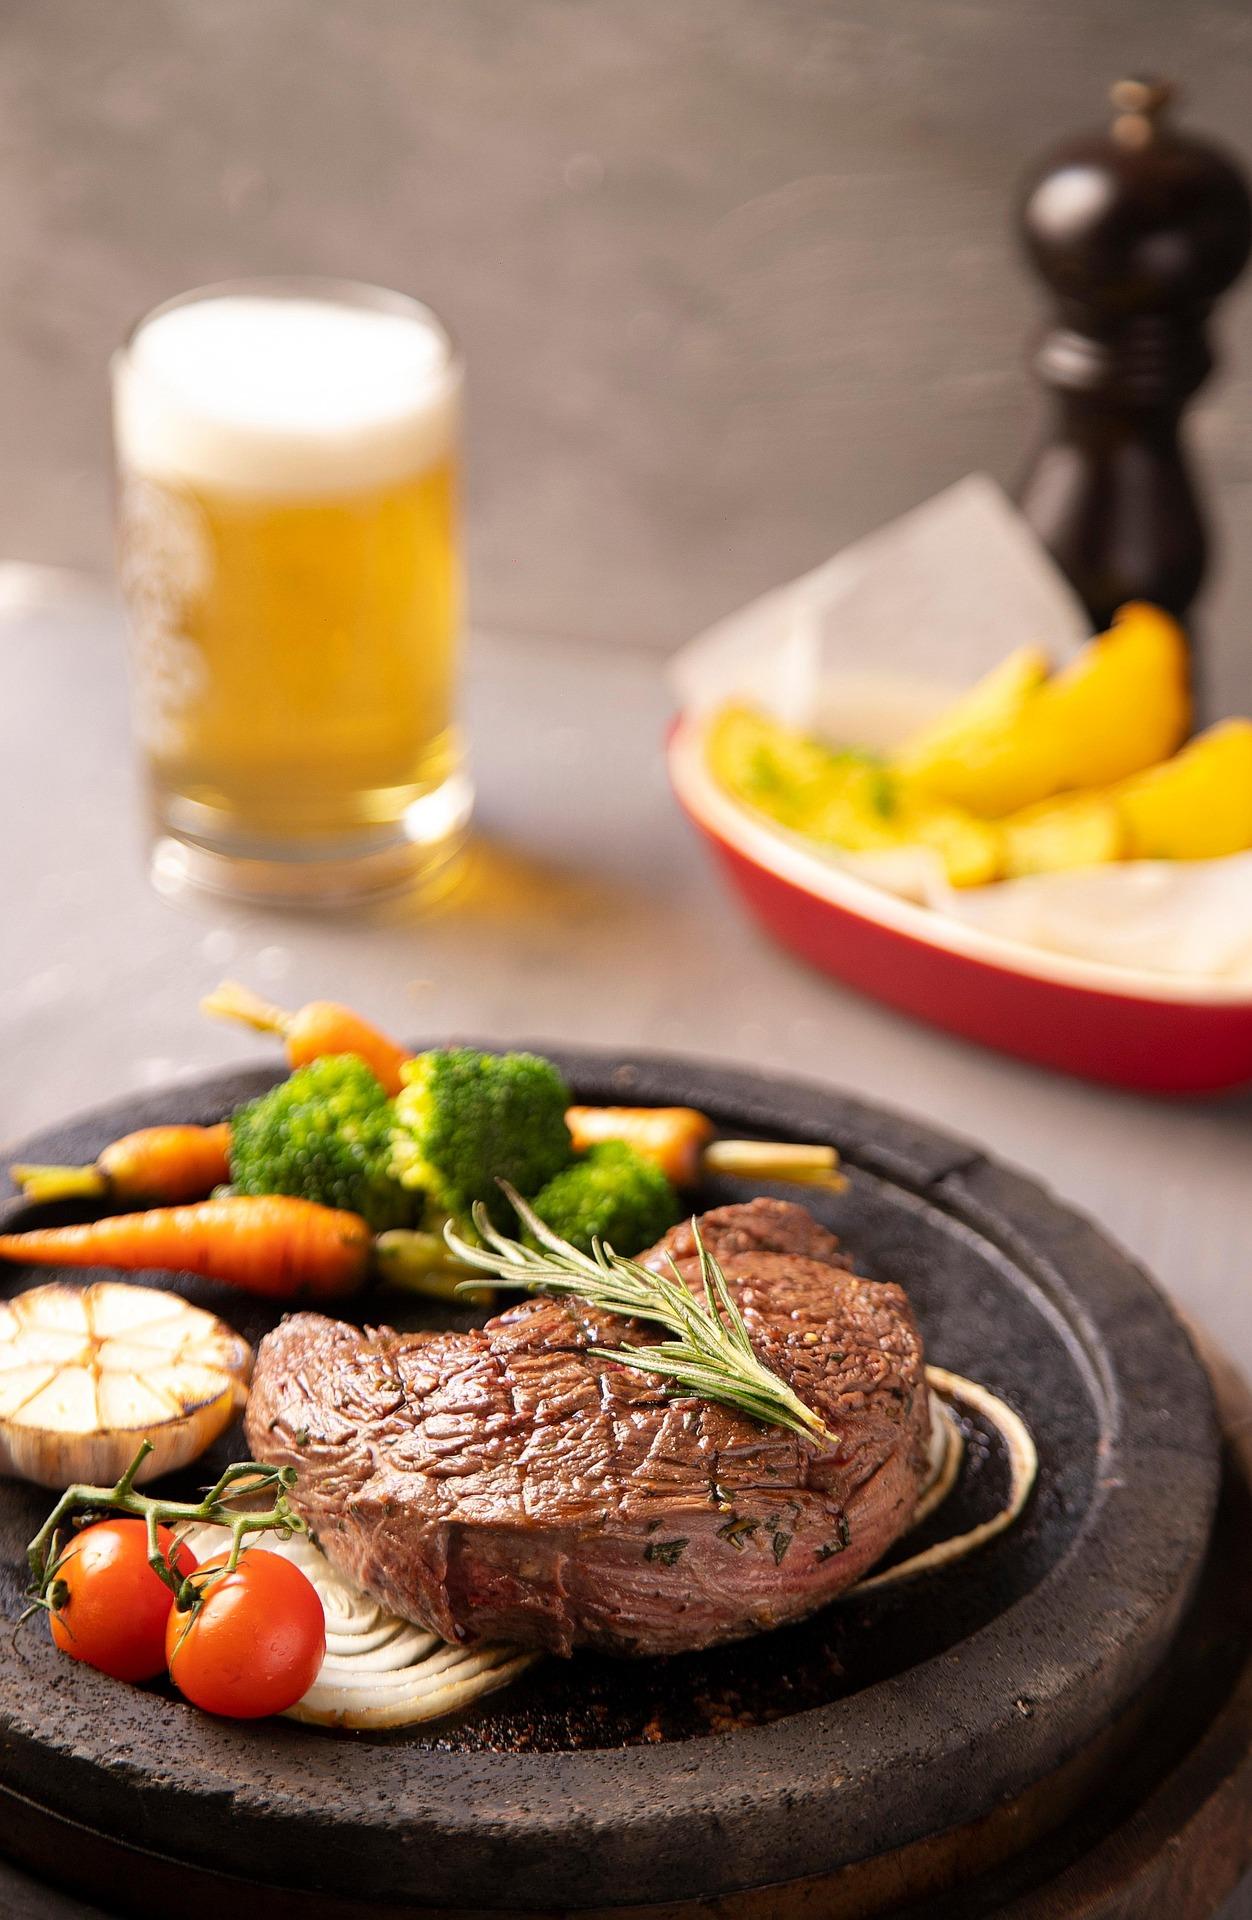
Getting the hang of cooking beef ribs is a game changer for any grill master. If you want to impress your friends and family, knowing how to grill beef ribs like a pro is essential. These juicy cuts are packed with flavor, and with a few simple steps, you’ll be the hero of the backyard barbecue.
First off, pick the right ribs. Look for beef ribs that have marbling throughout the meat; this is where the flavor hides. Don’t forget to remove the silver skin on the back. It can be tough, and you want your ribs to be tender. A sharp knife does the trick, and it’s easy once you get the hang of it.
Next up, seasoning! You can keep it simple with just salt and pepper, or go heavy on the rub with spices like paprika, garlic powder, and brown sugar. Rub it all over the ribs and let them sit a bit. This allows the flavors to seep in. You can even go the extra mile by marinating them overnight. Your taste buds will thank you!
Now for the grilling step. Preheat your grill to a low temperature, around 225°F to 250°F. This low and slow method brings out the best in beef ribs. Place the ribs bone-side down and let them cook for several hours. Keep an eye on them and spritz with apple juice or beef broth to keep them moist. When they’re ready, you’ll see that beautiful pull back from the bone.
Finish them off with a glaze or barbecue sauce for that sticky, sweet finish. A few minutes over high heat at the end gives them that nice char. Trust me, once you know how to grill beef ribs like a pro, you’ll be the go-to for all meat-loving gatherings. Get ready for compliments and requests for seconds!
Choose the Right Ribs for Grilling
When it comes to grilling, choosing the right ribs can make a world of difference. You’ve got a few options when it comes to beef ribs, and each one brings its own flavor and texture to the table. Let’s break down what you should look for to ensure you grill beef ribs like a pro.
First up, there are two main types of beef ribs: back ribs and short ribs. Back ribs are taken from the top of the rib cage and have great meat around the bones. They’re perfect for grilling since they cook quickly and have a nice chewy texture. On the other hand, short ribs come from the lower part of the rib cage and are meatier. They’re packed with flavor and are fantastic when you slow-cook or grill them low and slow.
Look for ribs with good marbling. This means you want fat running throughout the meat, which helps keep everything juicy and tender as it grills. When you’re at the store, try to choose ribs that are uniform in size so they cook evenly. And don’t be shy about asking your butcher for advice on the freshest cuts available!
Another tip is to check for the right color. Fresh beef ribs should have a bright red color with a good layer of fat. Avoid any ribs that look brown or discolored. Also, if you can, pick up a package and feel the weight. Hefty ribs usually mean good meat—and you want the good stuff when you’re figuring out how to grill beef ribs like a pro!
Smokehouse Fully Cooked Corned Beef Brisket Trays
Enjoy tender, flavorful brisket that's ready to serve for your next meal or gathering
Product information
$110.00
Product Review Score
4.65 out of 5 stars
169 reviewsProduct links
Essential Tools for Perfectly Grilled Ribs
Getting those beef ribs just right takes more than just a good recipe. You need the right tools to really shine on the grill. Here's what you'll want to have on hand for your next cookout so you can learn how to grill beef ribs like a pro!
1. A Quality Grill
First up, you’ve got to have a solid grill. Whether you go for gas, charcoal, or even a pellet grill, pick one that heats evenly and is the right size for your needs. A good grill gives you that smoky flavor and helps you nail that perfect cook.
2. High-Temperature Gloves
Grilling can get hot, and safety should be your priority. Grab a pair of heavy-duty, heat-resistant gloves. You’ll need them for handling ribs and other hot items without burning yourself. Plus, they give you a better grip!
3. Meat Thermometer
You can't guess your way to perfect ribs. Invest in a reliable meat thermometer. It'll help you know exactly when your ribs reach that tender, juicy state without overcooking them. Quick tip: aim for an internal temp of around 190°F for that fall-off-the-bone experience.
4. BBQ Sauce Brush
A good BBQ sauce brush can elevate your ribs. Use it to slather on your favorite sauce during the last minutes of cooking. This will give your ribs a beautiful glaze and keep them moist and flavorful.
With these essential tools, you’ll be fully equipped to grill beef ribs like a pro. Get your gear ready, and it’s time to fire up that grill!
Santa Carota Grass-Fed Ground Beef 70/30 Bundle
Enjoy rich flavor and juicy texture with this premium grass-fed beef, perfect for all your favorite meals
Product information
$141.24
Product Review Score
4.25 out of 5 stars
127 reviewsProduct links
Flavoring Tips for Delicious Beef Ribs
Getting your beef ribs to pack a flavorful punch is the secret to taking your grilling game to a whole new level. When you're thinking about how to grill beef ribs like a pro, flavoring is key. Start off with a good rub. A mix of brown sugar, smoked paprika, garlic powder, and salt will create a nice crust and add depth. Just a good coating will do wonders.
Don’t skip the marinating step either. A simple marinade made with soy sauce, Worcestershire sauce, and your favorite spices can add a savory kick. Let those ribs soak up those flavors for a few hours or even overnight. When you finally throw them on the grill, you'll taste the difference.
If you want to step it up, consider adding some smoke. Wood chips from hickory or mesquite can really enhance the flavor of your beef ribs. Just soak them in water for about 30 minutes beforehand, then place them on your grill. You’ll love the smoky aroma that fills the air.
As you grill, brush on some barbecue sauce. You can go with a store-bought favorite or whip up your own. Just remember to add it toward the end of cooking. If you add it too early, it can burn and lose that delicious glossy finish. Brush it on a few minutes before you take them off the heat for that perfect sticky glaze.